Use CircleCI to implement CI/CD and deploy to AWS S3

Some important concepts before we start
1. CI/CD
During the development of a project, developers will commit and push code to the main branch of a shared repository frequently. Of course, before commit/push, we usually need to run tests and check code style to insure the new code could integrate with existing code very well.
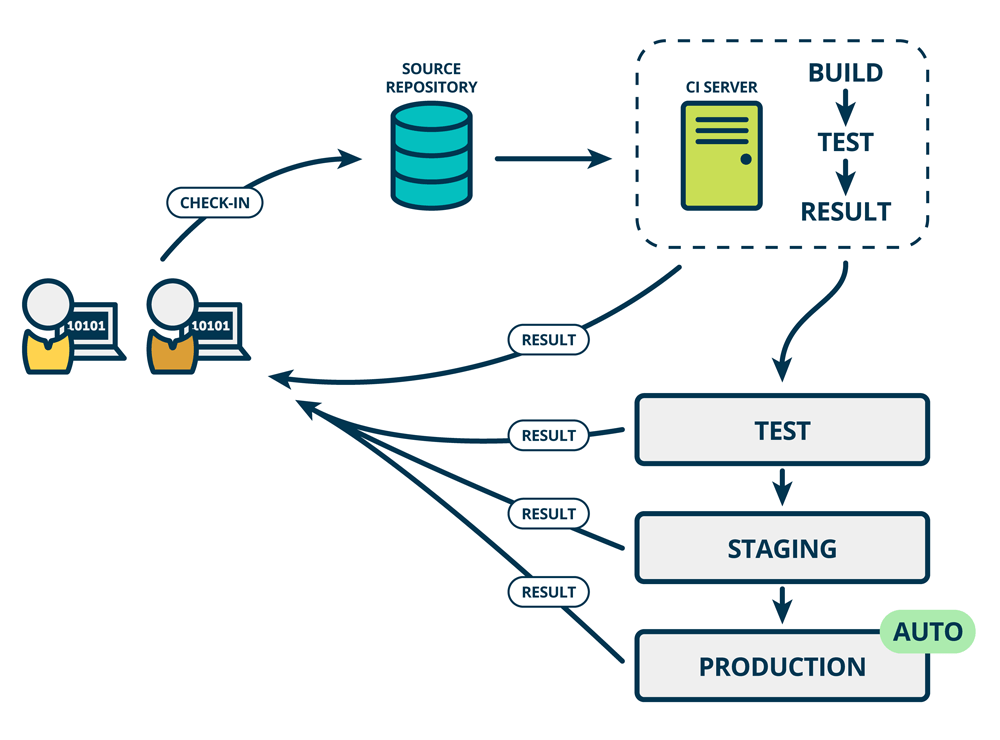
With this purpose, Continuous Integration (CI) and Continuous Deployment (CD) provide a sort of common software development practice. This is how them work:
-
Developers check the code locally on their computers
-
When completed — they commit changes to the repository
-
Repository sends a request (webhook) to CI system (usually we can config which branch will execute which jobs pipeline)
-
CI server runs job (tests, coverage, lint and others)
-
CI server releases saved artifacts for testing
-
If the build or tests fail, the CI server alerts the team
-
The team fixes the issue
-
If the build and tests succeed, the CD server (if has) deploys current branch code to app server (in this case, we will show how to deploy to AWS s3 bucket)
Bonus
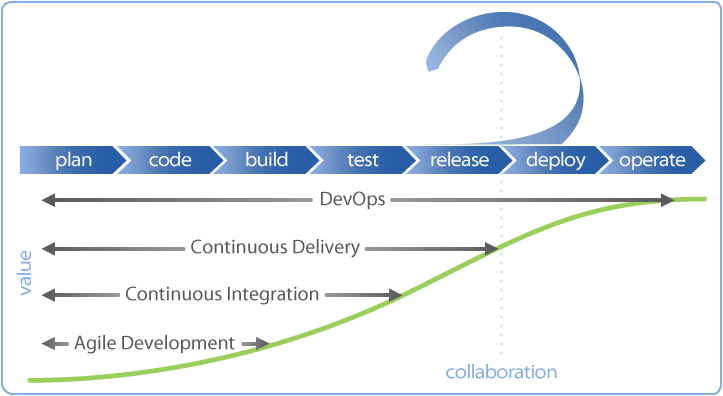
How to distinguish these concepts? DevOps, Agile development, CI and CD. This image can tell you all of them
2. Create a React project with CRA
We will create a React app with Create React App (CRA) to connect with CircleCI server and deploy to AWS S3 bucket. This official doc will help you to initialize a React app with it.
After you finish it, you should get a web app project with following output:
my-app
├── README.md
├── node_modules
├── package.json
├── .gitignore
├── public
│   ├── favicon.ico
│   ├── index.html
│   ├── logo192.png
│   ├── logo512.png
│   ├── manifest.json
│   └── robots.txt
└── src
    ├── App.css
    ├── App.js
    ├── App.test.js
    ├── index.css
    ├── index.js
    ├── logo.svg
    └── serviceWorker.js
In this project, we already have the start, test and build features, and it already was initialized as a git project. Cool, all done.
3. Push your local project to a remote repository
CircleCI supports Github or Bitbucket, here we will use Github as remote repository.
-
Create a new repo in Github for
my-appcode:
-
Use command line to redirect to the root of
my-appand push codegit remote add origin git@github.com:<your-user-name>/my-circleci-example.git git push -u origin masterThe code should be in your Github
my-circleci-examplerepo right now. -
Keep your machine login on Github right now.
4. Connect with CircleCI
-
Just login to CircleCI. When GitHub prompts you to authorize CircleCI, click the Authorize application button. And maybe you also need to choose which organization will be connected if you have multiple organizations within Github account.
-
You will be redirected to Projects page, you can set up and follow repos here.

-
Click Set Up Project button and on next page, choose
Nodefrom the dropdown list. Right now you should see the default Nodeconfig.ymlcontent:version: 2.1 orbs: node: circleci/node@1.1.6 jobs: build-and-test: executor: name: node/default steps: - checkout - node/with-cache: steps: - run: npm install - run: npm test workflows: build-and-test: jobs: - build-and-test
orbs: A reusable package of YAML configuration that condenses repeated pieces of config into a single line of code. In this case, we will use pre-buildnodeandaws-s3orbs. You also can create your own orbs for your organization.
jobs: a set of the job what you intend to do during this CI process. We only havebuild-and-testright now. Within we haveexcutorwhich is the environment where the steps of this job run.
workflows: tell CircleCI how to run the jobs. You can add a bunch of configs for the schedule here.You can find all configuration docs of this
config.ymlhere.
We can click the rightmost button Add Config to use this default config and start CI process. This is enough for now, click it!
You should find you are redirected to the pipeline page and one pipeline is running.

Seconds ago, CircleCI created a new branch circleci-project-setup and a new commit Add .circleci/config.yml . This initial pipeline should take just seconds and succeed.
-
Go back to the example repo on Github, you will find Github gives to you a notification of new branch and new commit. Right now you need to create a pull request and merge this branch to
masterbranch. You can do it on Github page simply for now. -
Once you finish the merge, the CircleCI will run the pipeline again, this time it's for
masterbranch, and of course the commit is the new PR merge commit.
5. Write our own config file and deploy production version to AWS S3 bucket
Let's start the CD part!
First of all, you need create a new S3 bucket on AWS. Let's say you already had the AWS account and you are using the non-root IAM account right now.
-
Create a new bucket named my-circleci-example and untick the Block all public access, which make your bucket can be accessed from internet.
-
Go to the new bucket > click Permissions tab > click Bucket Policy button > In the editor change the bucket policy with the following policy and save.
{ "Version": "2012-10-17", "Statement": [ { "Sid": "PublicReadGetObject", "Effect": "Allow", "Principal": "*", "Action": "s3:GetObject", "Resource": "arn:aws:s3:::my-circleci-example/*" } ] } -
Back to Properties tab and click Static website hosting block, config it like this and save:
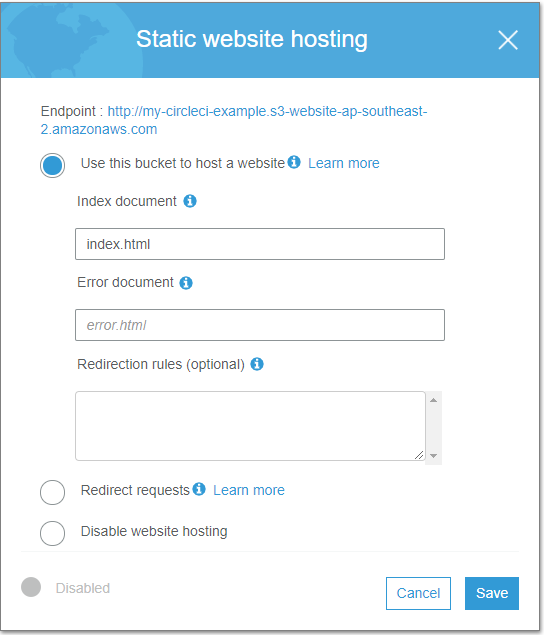
If you click the Endpoint, of course you will get a 404 error page. Right now we'll upload the app code via CircleCI.
-
Now we need get the AWS access for CircleCI. Search IAM in the AWS services, then go to page of the user who created the new bucket. Then go to Security credentials tab, and click Create access key button to create a pair of access key ID and secret key.
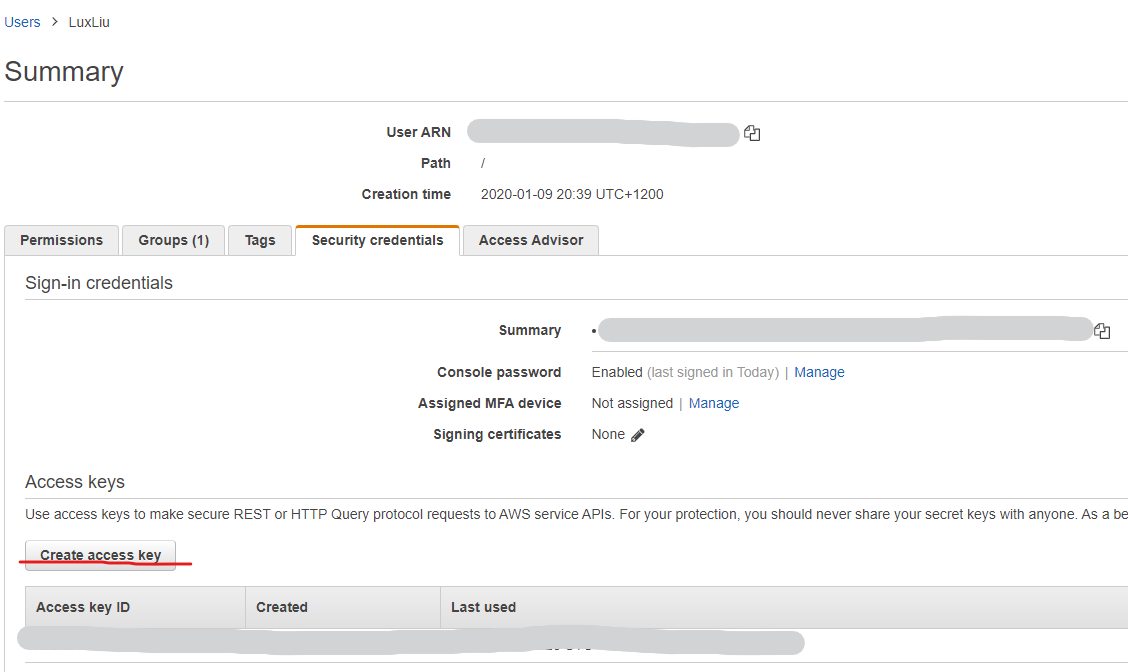
Don't forget to get the bucket region as well.
-
Where should we put these credentials? Of course NOT in the code. We can put them in the project environment variables on CircleCI !
Back to the pipeline page of CircleCI, then click the top-right button Project Settings , then switch to Environment Variables link, you can add all three variables here.
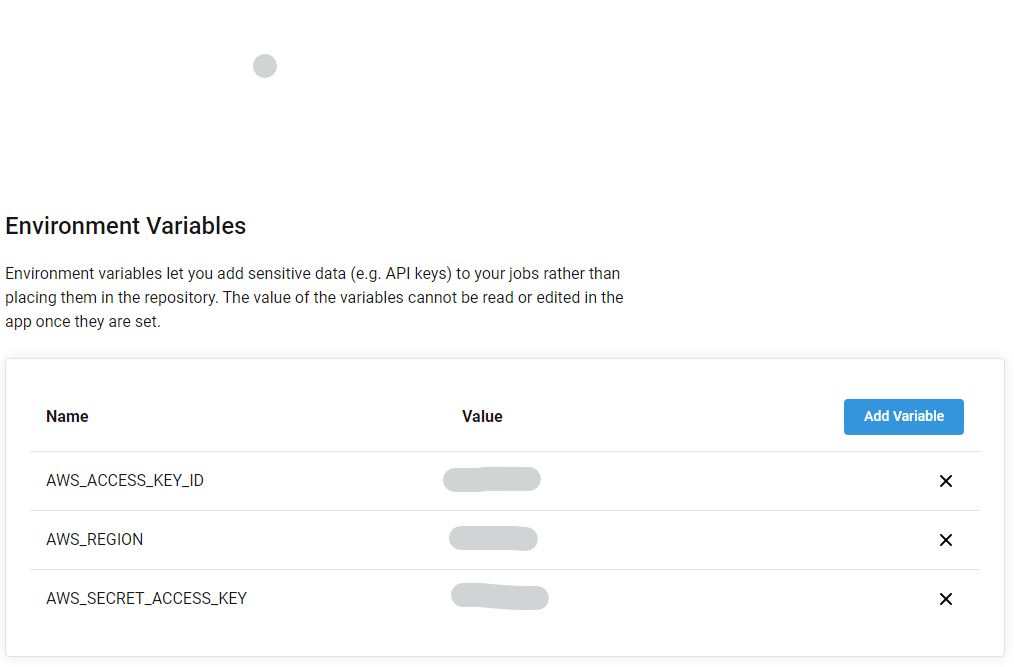
NOTE: the variable naming should follow the picture as they are default values of
aws-s3orb. you can customized the variable naming and override them in config YAML file. This is the official doc ofaws-s3orb. -
Back to local
my-appcode first, and onmasterbranch rungit pullto get the new code. Right now you should have a new.circlefolder and a fileconfig.ymlwithin locally. -
Create a new branch
add-deploy-config, and modify this config YAML file like this:version: 2.1 orbs: node: circleci/node@1.1.6 aws-s3: circleci/aws-s3@1.0.15 jobs: test-and-build: executor: name: node/default steps: - checkout - node/with-cache: steps: - run: npm install - run: npm test - run: npm run build - persist_to_workspace: root: ~/ paths: - project/build deploy-to-s3: machine: image: circleci/classic:latest steps: - checkout - attach_workspace: at: ~/ - aws-s3/sync: arguments: | --acl public-read \ --cache-control "max-age=86400" from: build to: 's3://my-circleci-example' overwrite: true # default is false workflows: build-and-deploy: jobs: - test-and-build - deploy-to-s3: requires: - test-and-build filters: branches: only: masterLet's have a dive into this new configuration:
We have a new job:
deploy-to-s3. This job only runs whentest-and-buildfinishes and the current branch ismasterbranch.Within this
deploy-to-s3, we useaws-s3orb to do the code sync job: from build folder to s3://my-circleci-example bucket, and delete content in bucket first (with overwritetrue.NOTE: if you want to share some content between different workflow jobs, which are
test-and-buildanddeploy-to-s3here, you have to share the workspace between them. We usepersist_to_workspaceto persist thebuildresult, and useattach_workspacein ``deploy-to-s3` to get it. -
Right now you can stage, commit and push the new branch
add-deploy-configto Github. CircleCI will run the pipeline for this branch, of course it will ignore thedeploy-to-s3job. -
On Github page, you need do the same thing: create a pull request then merge it! Look at the CircleCI pipeline page, you will have the successful
test-and-buildthendeploy-to-s3.
Finally, you can go to the endpoint to have a look at what you just deployed.
Have fun!😀